
Appearance
Install the tracking code
Replora records a page only when its tracking code is on that page. The code is one short line; the Install page shows it, gives two other ways to add it (Google Tag Manager and an npm package for web apps), and checks that data is arriving.
Where: in the sidebar, under your website, click Install. It is also among the buttons above the session list, and the tracking code alone is at the top of the website’s Settings page.
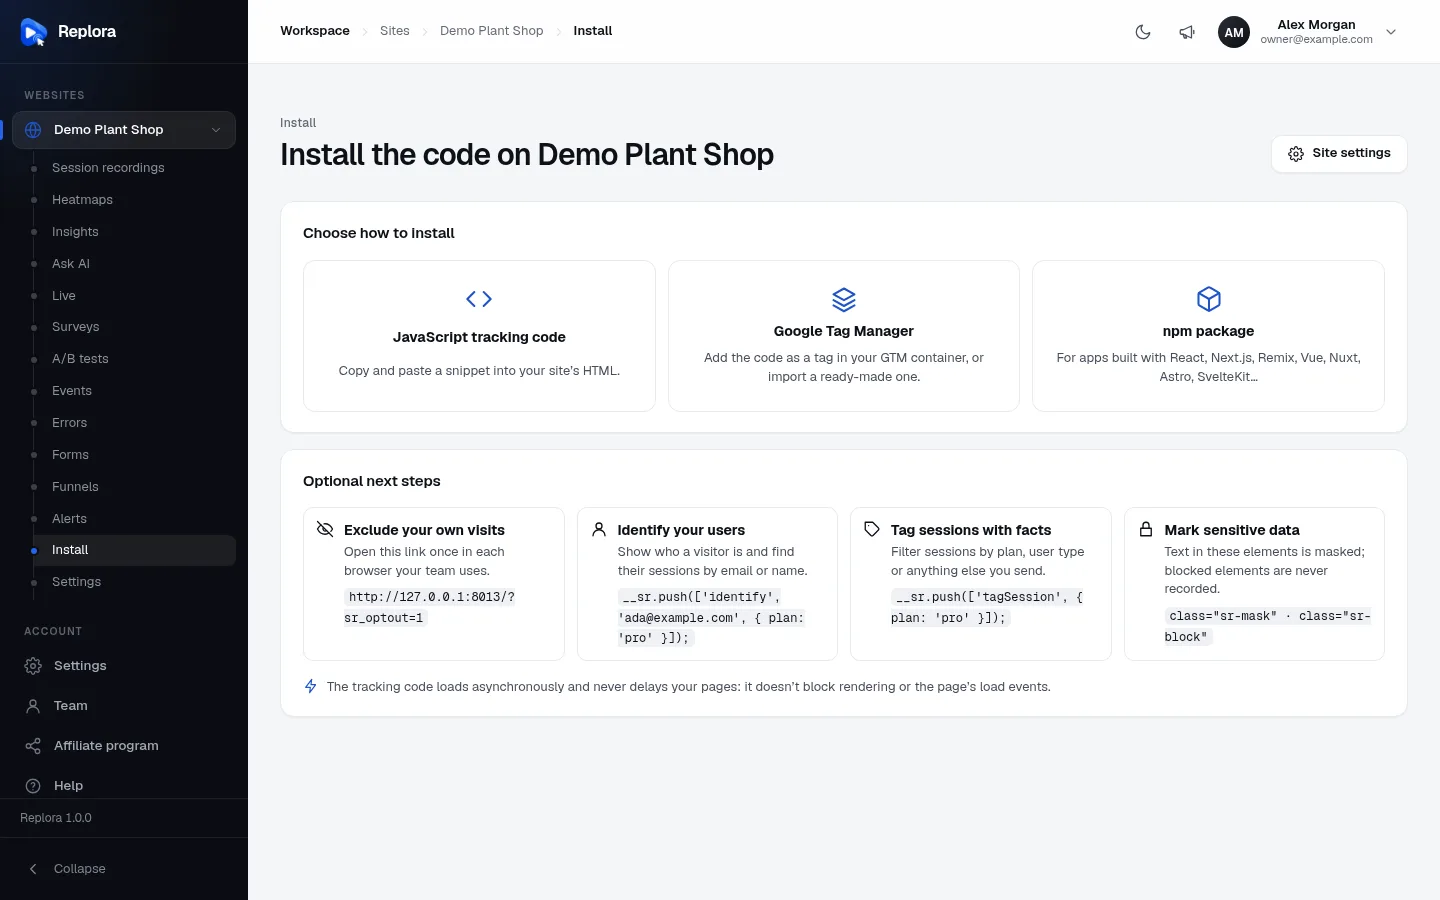
Choose how to install
The page starts with three choices. Click one to see its steps; Choose a different method brings you back.
| Method | Best for | What you need |
|---|---|---|
| JavaScript tracking code | Any website: a hand-made site, a shop system or a CMS with a place for “header code”. | Access to the site’s HTML, or a settings field that adds code to every page. |
| Google Tag Manager | Websites that already use Google Tag Manager (GTM). No change to the website itself. | Permission to edit and publish the GTM container. |
| npm package | Web apps built with React, Next.js, Remix, Vue, Nuxt, Astro, SvelteKit… | A developer. The page shows the exact files to add. |
All three record the same data: pick one, and put the code on your pages only once.
It doesn’t slow your pages down
The tracking code loads asynchronously and never delays your pages: it doesn’t block rendering or the page’s load events.
JavaScript tracking code
The Tracking code card shows your website’s code, a single <script async …> line with your website’s key in it, and a Copy button.
- Click Copy.
- Paste the code into the
<head>of every page you want to record. Most website builders and shop systems have one place for code that goes on every page, often called Header code, Head scripts, Custom code or Tracking code. Pasting it there once is enough. - Publish or save the change on your website.
- Open a page of your website and come back: the card’s label changes from Waiting for the first visit to Receiving data · a few seconds ago.
WordPress and other website builders
Replora doesn’t need a special plugin. In WordPress, use your theme’s “header code” setting or any plugin that inserts code into the <head> of every page, and paste the tracking code there. Shopify, Wix, Squarespace, Webflow and similar builders all have a “custom code in the head” setting for the whole site; paste the code there. If you are not sure, send the code to the person who looks after your website.
Under the code, the card reminds you of three privacy switches your web developer can use on the pages:
| On the page | Effect |
|---|---|
class="sr-block" on an element | The element is never recorded: it appears as an empty box in replays. |
class="sr-mask" on an element | Its text is recorded as ***. |
window._srOptOut = true set before the script loads | Nothing is recorded on that page, for example until the visitor accepts cookies. |
Everything visitors type is masked already; you don’t need to mark form fields.
Google Tag Manager
The Install with Google Tag Manager card adds the code as a tag, with no change to your website’s code.
- In Google Tag Manager, open your container, then Tags → New → Custom HTML.
- Paste the tracking code shown on the card, choose the All Pages trigger and save.
- Submit and publish the container.
Or import it: click Download the GTM container to get a ready-made file with the tag already set up. In Google Tag Manager go to Admin → Import Container, choose the file and pick Merge (so your existing tags stay). Then submit and publish.
npm package
For web apps, developers can install Replora as a package instead of a script line. Choose your Framework (JavaScript, React, Next.js (App Router), Next.js (Pages Router), React Router, Remix, Vue, Nuxt, Astro or SvelteKit): the card shows the command to run in the Terminal and the files to add or change, already filled in with your website’s key, each with a Copy button. Hand this card to your developers. They will find more in the developer docs.
Verify the installation
Once you picked a method, the Verify the installation card appears.
| Part | What it does |
|---|---|
| Status label | Receiving data · when (green) once data has arrived, or Waiting for the first visit. |
| Diagnostics address | Your website’s address with ?sr_diagnostics=1 added. Open it in your browser: a small Replora diagnostics panel appears at the bottom left of your page, only in your browser, and shows what the tracking code sees (see below). It stays on in that tab until you open a page with ?sr_diagnostics=0. |
| Check installation | Asks Replora whether data has arrived. You get Data is arriving: the tracking code works. or No data yet. Open a page of your site, wait a few seconds and check again. |
The diagnostics panel shows:
| Line | What it tells you |
|---|---|
| Site key | Your website’s key: it should match the one in your tracking code. |
| Server | Where recordings are sent. |
| Recording | on (or on (sent after N s) when you set a minimum session length), or off / paused / stopped with the reason: this browser opted out, the website’s rules excluded this visit (IP address, sampling, pages, targeting), the website never records this page, or the page is in the A/B test editor. |
| Session | The current session’s ID. |
| Uploads | How many uploads were sent and the server’s last answer, or server unreachable (will retry). |
Optional next steps
The Optional next steps card, always at the bottom of the page:
| Step | What it does |
|---|---|
| Exclude your own visits | A link to your website with ?sr_optout=1. Open it once in each browser your team uses: those browsers are never recorded. ?sr_optout=0 undoes it. |
| Identify your users | A line your developers add so sessions show who the visitor is (email or name) and you can search by it. |
| Tag sessions with facts | A line your developers add to tag sessions (plan, user type, anything) so you can filter by it and show it as a column. |
| Mark sensitive data | The sr-mask and sr-block classes described above. |
More commands (counting virtual pages, keeping one session across your domains, starting a new session at sign-out…) are listed under JavaScript commands on the website’s Settings page.
Troubleshooting
If the status stays at Waiting for the first visit:
| Check | What to do |
|---|---|
| Is the code on the page? | Open a page of your site, right-click, choose View page source and search for data-site. If it isn’t there, the code wasn’t saved, the page is cached, or (with GTM) the container wasn’t published. Clear your website’s cache and try again. |
| Is the domain allowed? | The website’s Allowed domains (in its settings) must include the domain you are testing on. example.com covers www.example.com, but not example-shop.com or a staging domain. |
| Is recording turned on? | In the website’s settings, Recording enabled must be on. The Sites page shows Paused otherwise. |
| Are your rules excluding you? | Your IP address in Never record these IP addresses, a share of sessions under 100 %, Only record visits that start on, targeting, a minimum session length, or the opt-out link opened earlier all stop recording. Open the diagnostics address: the Recording line says why. |
| Ad or tracking blockers | Some browser extensions block recording scripts. Try a private window without extensions, or another browser. |
| Cookie consent | If your site sets window._srOptOut = true until visitors accept cookies, accept them in the test. |
| Not enough time | A visit appears a few seconds after the page opens. With a minimum session length, nothing is sent before the visit is that long. |
| Plan quota | Your plan limits the sessions recorded each month. Check the usage cards on the Sites page and see Plan & billing. |
If none of this helps, send the diagnostics panel’s lines to support.
Related
- Add a website
- Website settings: privacy rules, sampling, domains and the JavaScript commands
- Session recordings: where the visits appear